During my road trip I got asked this one question over and over again: Niels, how did you plan your route and which application did you use? Well, after answering this question over a dozen times I thought it would be a good idea to dedicate a blogpost to my method. For my route planning I use the application called Google My Maps, not Google Maps. In this post I will show step by step how I used this easy to use application to mark my route and teach you how to add your own stories to each marker and how to share your maps on your website and social media.
Table of Contents
How to get started with Google My Maps
Step 1 : First of all, you will need to get an account with Google. If you have not done this already, please follow this link: Making an account on Google.
Step 2 : After establishing your account you can starting making your maps. Log in on the Google My Maps website: Google My Maps
Step 3 : Create a new map by clicking on the red button (top left corner) that says: Create a new map.
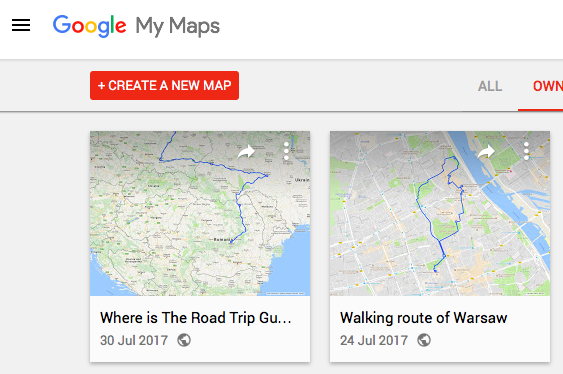
Creating your own map
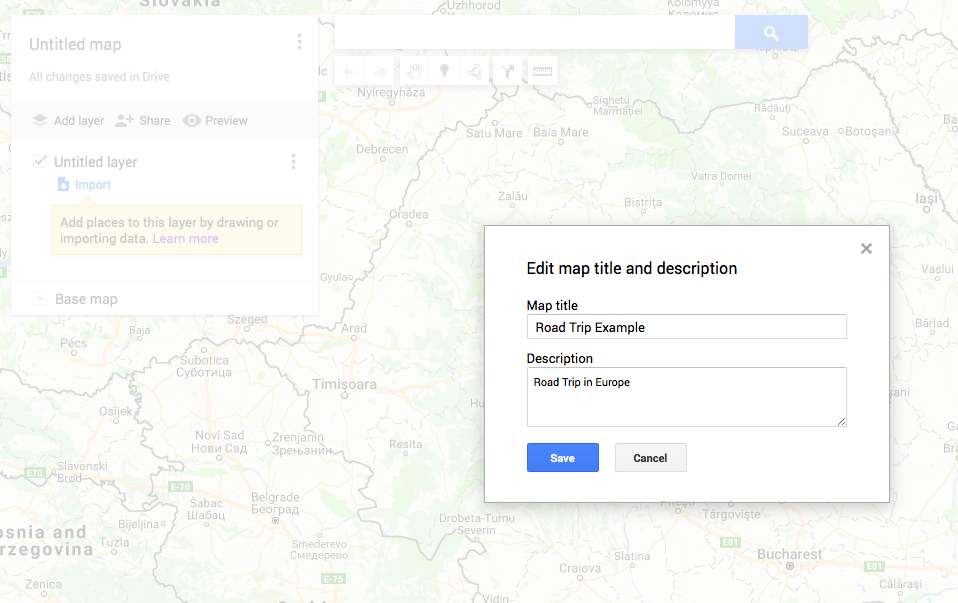
Step 4 : After you clicked on “Create A New Map” you can start making your new route. First click on “Untitled Map” and give your map a title and description. I filled in an example name and description for your reference. Click on “Save”.
Step 5 : In your toolbar you will find the “Add directions” option, click on this icon to start adding your destinations to create your route.
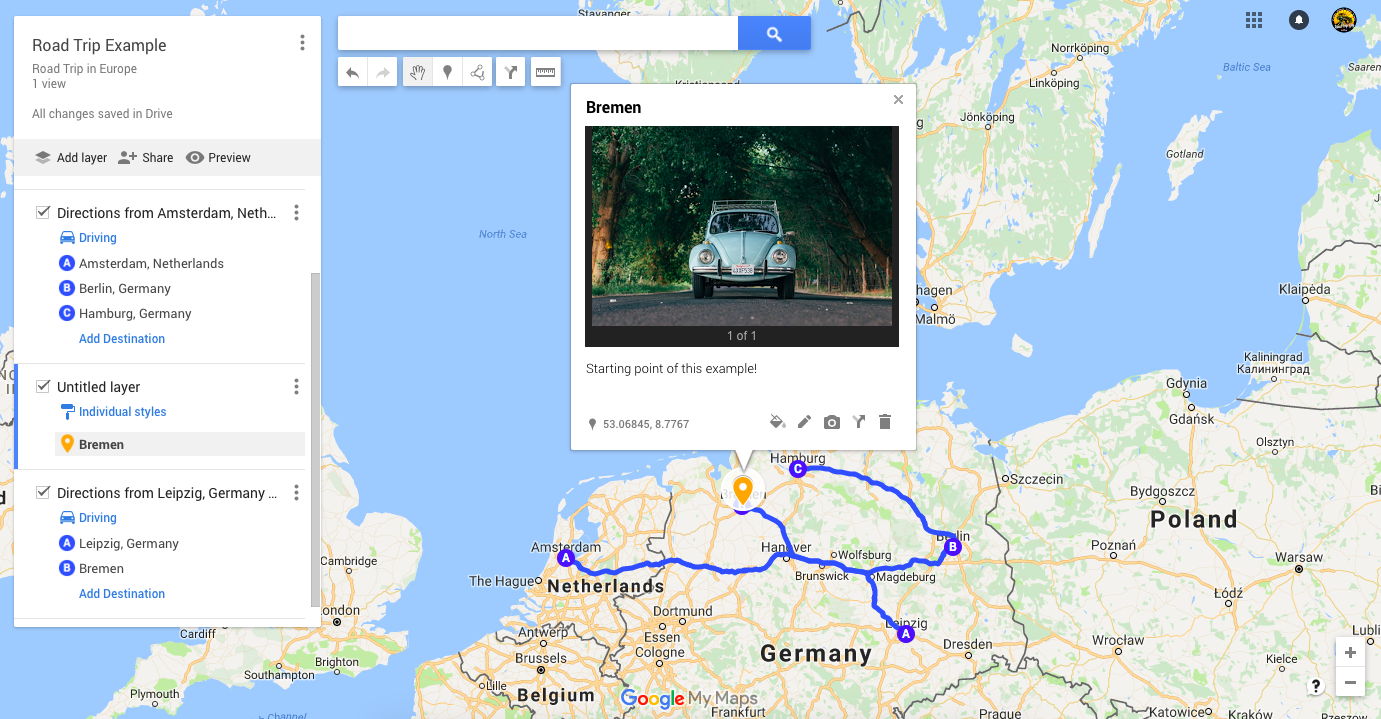
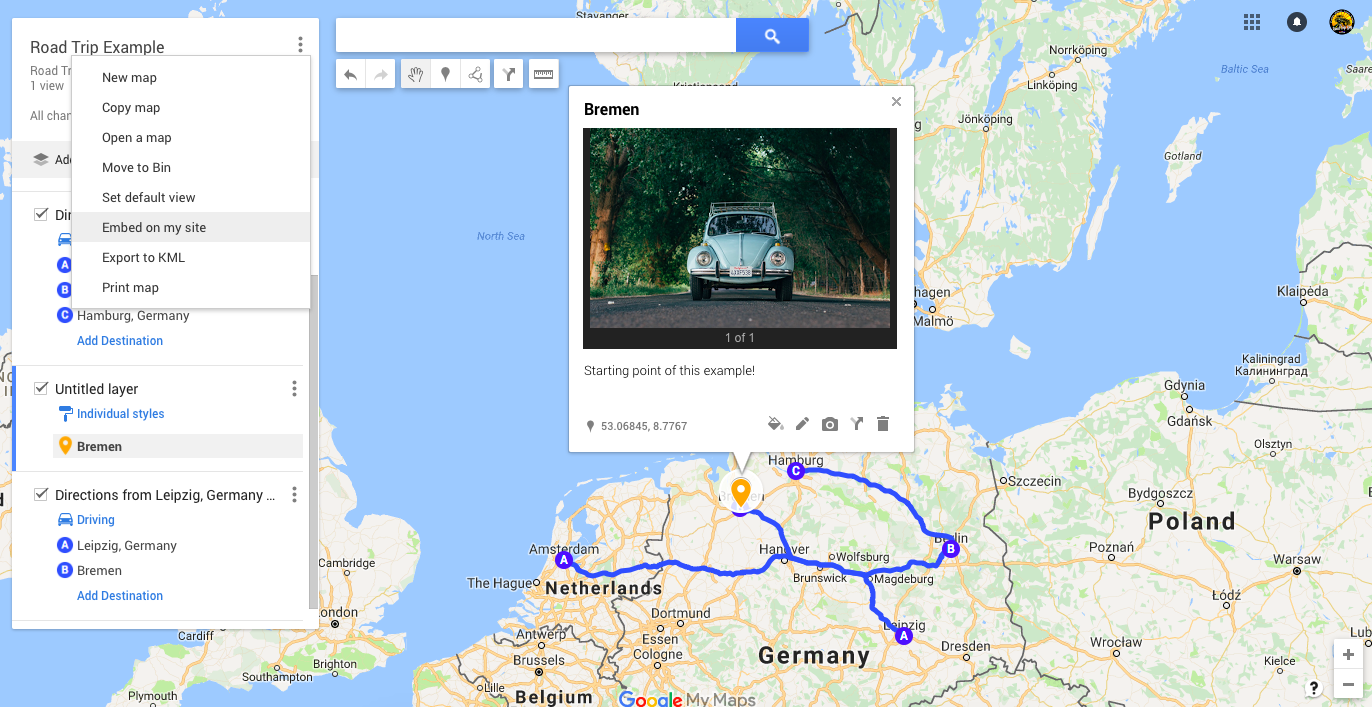
 Step 6 : For example, I used my first part of my European road trip (section: Europe Road Trip – 25.000 Km and 41 countries). This was between Amsterdam (Netherlands) and Berlin (Germany). Enter both cities in the fields on your left bar.
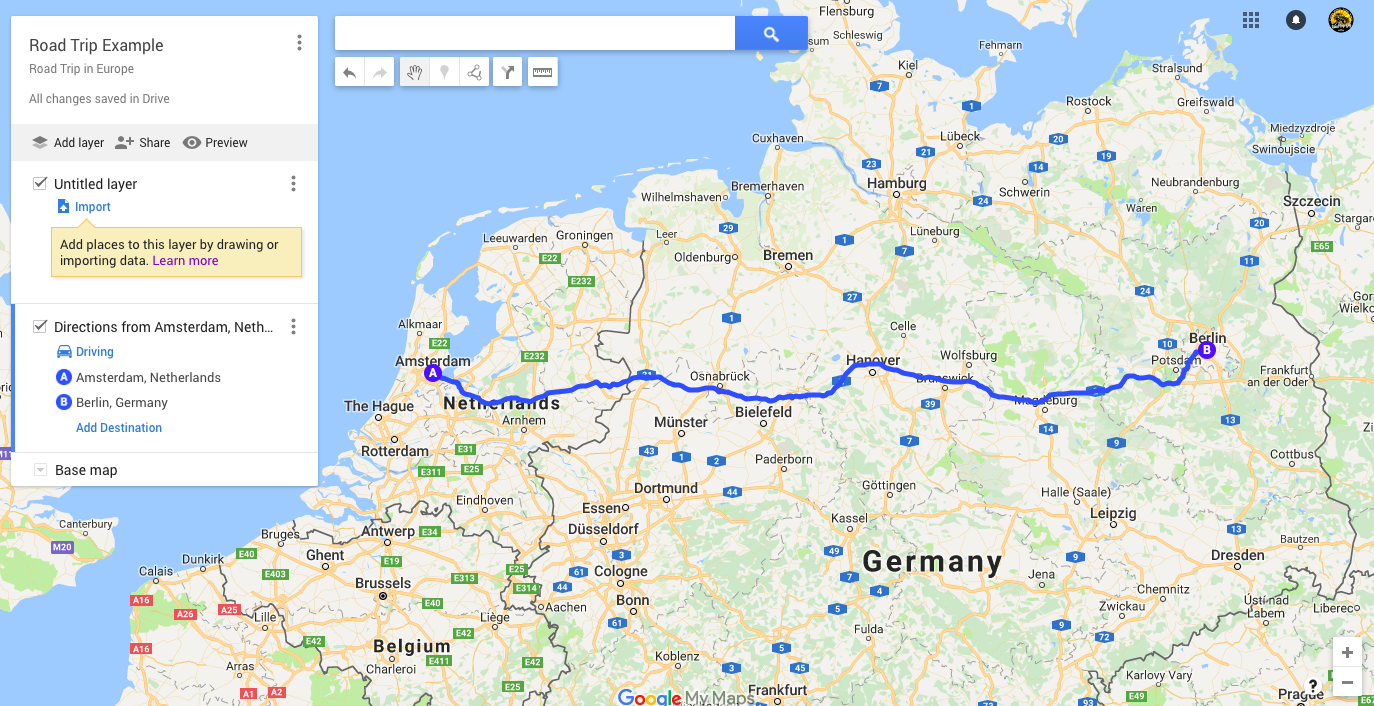
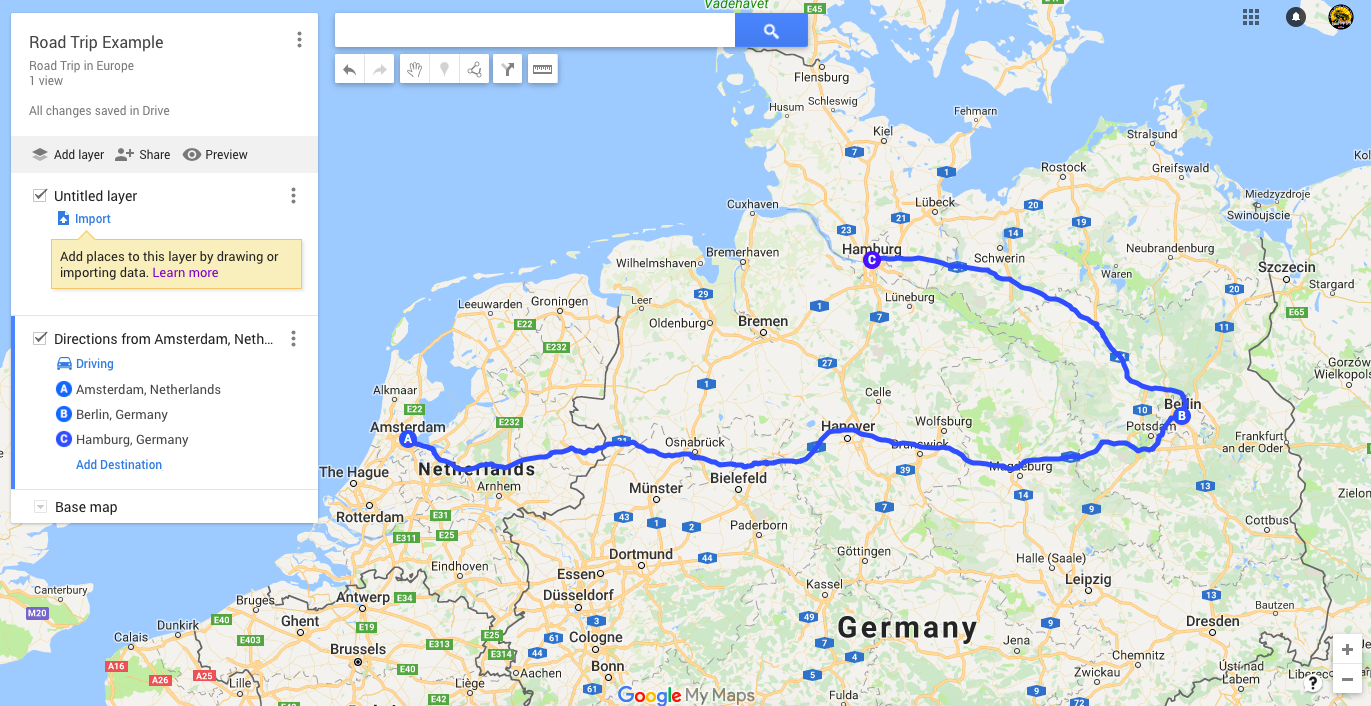
Step 7 : If you wish to add an extra destination simply click on “Add destination” at your route description and a point “C” will be introduced to your map.
Adding extra information
Step 8 : On you top toolbar you will be able to put a marker on your map. The marker will allow you to add extra information such as photos, directions, GPS coordinates and text. First click on “Add new layer” in your left bar. Once a new layer is established simply drag the market to your desired location and fill in your information. I put mine in Bremen (Germany) and will navigate to Leipzig (Germany).
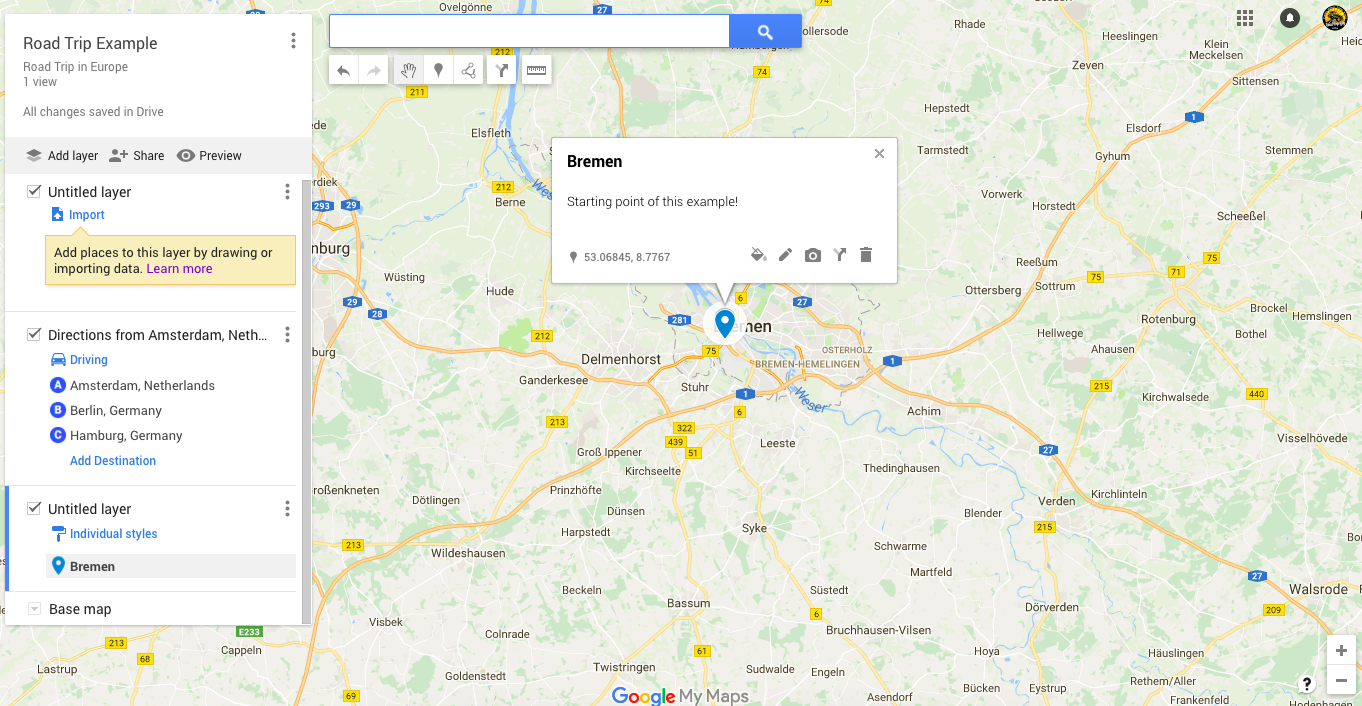
Step 9 : You can now add additional information like a picture gallery, but also change colors, style and icons.
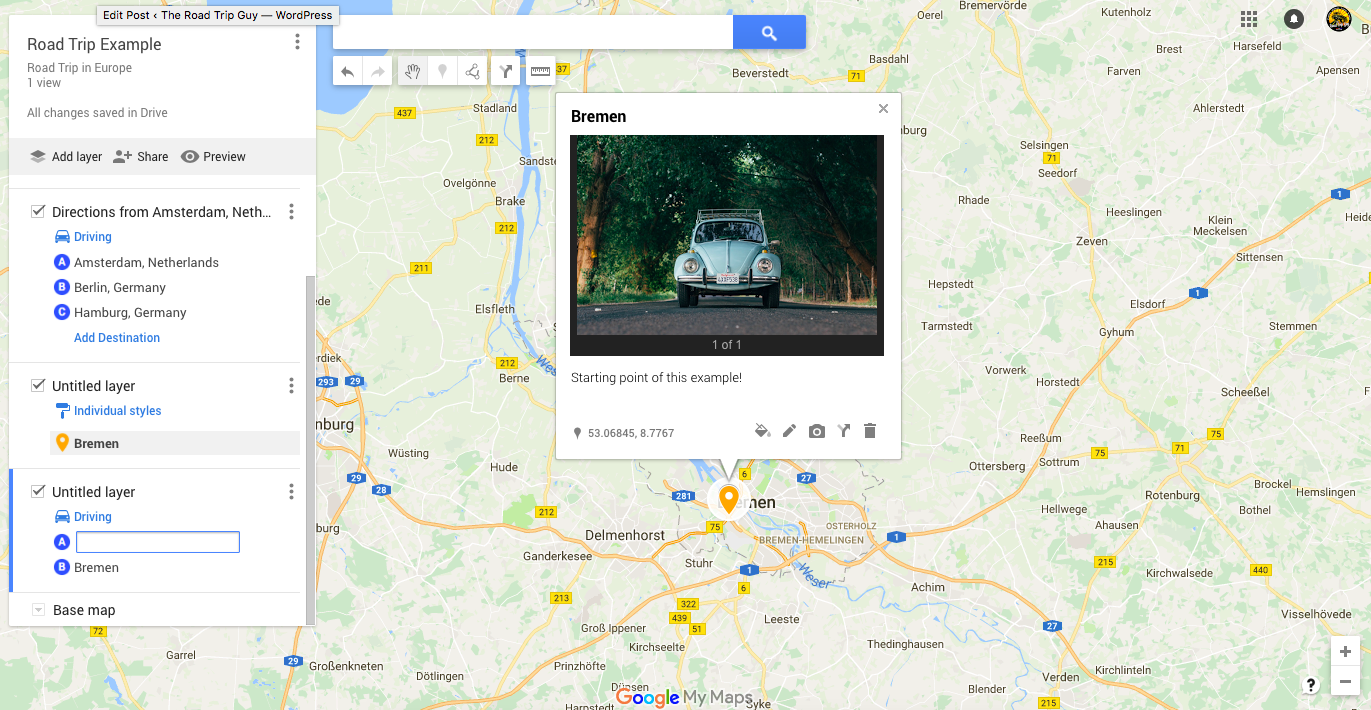
Step 10 : And now you are able to click on “Add direction” and make another route. You can do this also between two markers. This gives you the opportunity to share some pictures and information on each stop that you make.
How to make your map public
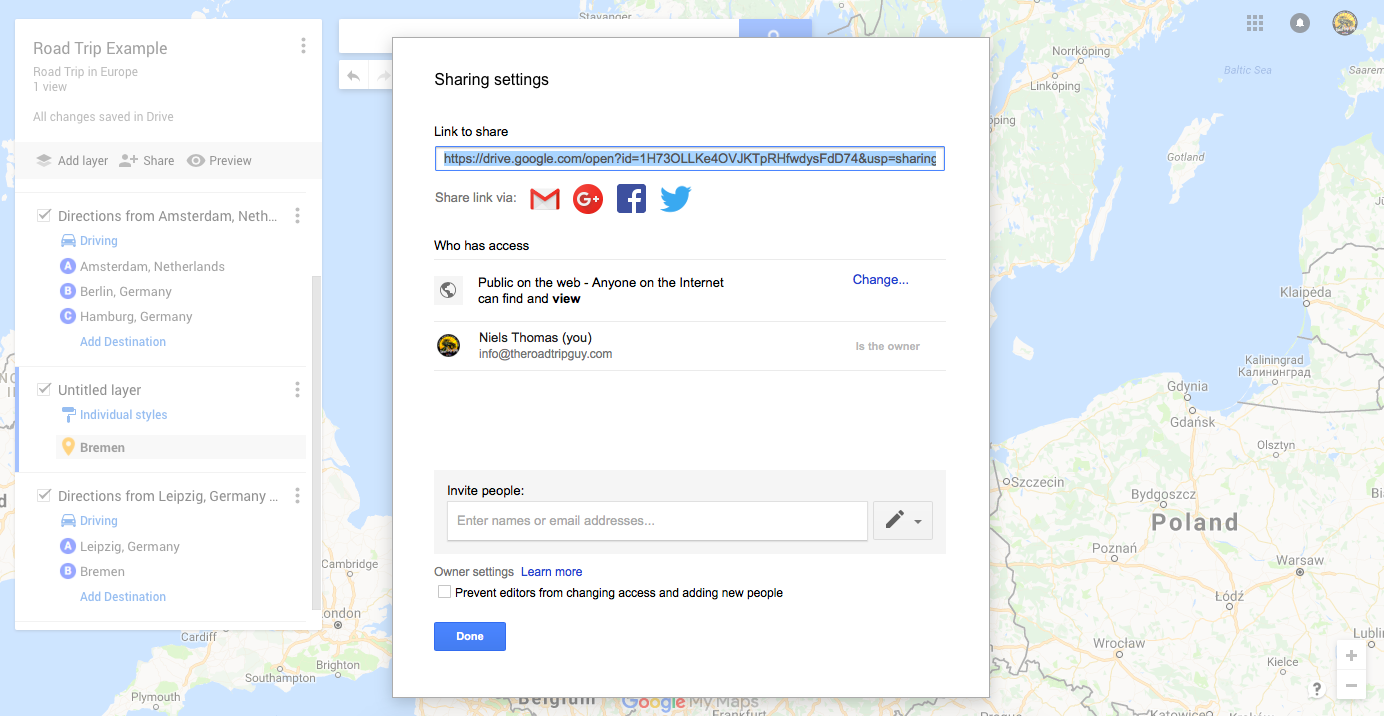
You have finished making your amazing road trip map, but how do I share it on my website or social media? To be able to share the map with your friends you need to make sure the map is set on “Public” and not “Private”. Click on the button: + Share , in the left box. Once that appears make sure you switch from “Private” to “Public on the web” so everybody can see your new map. For social media, you can use the link displayed at “Link to share”
For sharing Google My Maps on your website you need the map to be embedded on your website. Click on the right top corner of your left box on the three little vertical white dots. A menu will appear and you not to click on “Embed on my site”
Share the HTML code in your blogpost, and viola! You are ready to go! A cool interactive map with your road trip route! If you have any questions, please feel free to ask anytime in the comments section below. If you liked this article please share it on social media with your friends with the share-buttons. Have fun with your Google My Maps!


I love this so much. I haven’t been on a proper road trip in YEARS as I haven’t had to rent a car/I sold my car four years ago. I really want to do a massive road trip through the states someday in the future, and this would be great to separate it all by region or even state. Thanks for sharing!
Yeah its really a cool feature. Good luck with your travels and thank your for your comment! 🙂
I have been using Google My Maps since it launched (and used to save customised maps within Google Maps before that) and love it. I use it both for routes, if that’s relevant, but also to pin lots of restaurants, cafes, specialist stores and tourist attractions and so on, using the different icons available to show at a glance what is what.
Yes, the icons and interactive features is what makes it so great. Thanks for sharing your thoughts! 🙂
Google Maps is such a valuable tool for travel — and especially for road trips! Will definitely be using this function more. Thanks for the great post.
You are most welcome, Lucy.
I am saving this to Flipboard. I have been looking for something like this for ages. So useful thanks
Wow, great to hear Anne. Good luck and if you ever have any questions please let me know. 🙂
I must admit that I hadn’t heard of Google My Maps, though I know Google Maps well of course! How does it impact on site speed, hopefully it doesn’t slow it down? It’s great to keep track of the routes that you’ve travelled.
So far, so good. Just a few kb so that is no problem. 🙂
I love using google maps to plan road trips! It’s one of the most helpful tools when travelling around.
Thank you for the tutorial! I will pin this for future reference, thank you for sharing how to use google maps.
I am forever using google maps to plan trips, never had a problem with it. Cant wait for next road next week where we drive from London UK to Nice, France 🙂
Very nice trip! Just be careful as the heatwave ” Lucifer ” is currently in the south of Europa. I am in Sofia (Bulgaria) now and it is close to 40 degrees! :O
Such a valuable tool, totally worth. I also love the feature where you can download the maps for offline use. Comes handy when traveling alone.
Very handy guide. I use Google Maps all the time
i want to draw routes to reach destinations with different color. For example, to reach a destination on 1 day of my journey with blue color line. and orange for 2nd destination and so on.. and on 2nd day of my journey the same type of destination routes like in day 1.
how can i perform this ?
Hi Muhammad,
Unfortunate, I do not think that is an option in Google My Maps. 🙂
Sorry